I must say, I don’t think I have ever been so excited about a post before. The is the official internet unveiling of my first HUGE DIY project… And I can’t wait to tell everyone exactly how they can do the same thing to an old piece of furniture that they have!
For the prelude to this project, read PT. 1 here
In this post, I will tell you how I turned a thrift store discovery and a storage shed find into a wonderful “antique” piece of furniture that I will proudly display in my bedroom of my apartment next semester.
First, here’s a little visual of what I was working with before:
 The beautiful desk you see above was a thrift store find. My mom knew I had been searching high & low on Craig’s list to find a good deal on a desk, and when I came home from work one day, she had this lovely piece sitting on our back porch. It cost a whopping $30. It’s well-built, and has all the right drawers in all the right places. I’m in love.
As for the chair, my dad told me to check out some old chairs we had stored out in a building at the back of our land. It took digging through some Christmas decorations, but I found this old chair that came right out of New London school (dad got it some time ago and could never bring himself to get rid of it (thank goodness!)… it even had the room number written on the bottom from the classroom it belonged in.) There were two chairs to choose from, but I picked the one above because of the cool book rack underneath. It’s price? FREE
 When it came to supplies, I did quite a bit of research… I spent days on Pinterest trying to see how other people went about getting that faux-antique look. After doing this project myself, I hope that I cut out all the crap that you may not necessarily need, as well as explain a few things that were unclear to me as I was working on my desk. I was able to purchase everything at one quick stop at Lowe’s. Here’s my shopping list.:
- 1 qt. of paint- I chose Olympic One paint+primer Flat Finish and had it tinted to Royal Palm C62-3
$11.46
- 1/2 pint Minwax Wood Finish in Dark Walnut
$4.77
- One 2″ SOFT paintbrush. Don’t skimp on this brush and settle for a cheap-o!
$7.97
- One quart of Low Odor Mineral Spirits
$7.98
- One quart of Floetrol Paint Conditioner (minimizes brush strokes)
$6.97
- 1 spray can of Valspar Satin Clear Sealer
$3.98
In addition to these items that I purchased at Lowe’s, I had a few things lying around the house that you will definitely need before you start this project:
- Some type of finer grit sandpaper– don’t use anything too coarse (not pictured)
- Disposable towels, whether you use paper towels or have a heavier duty shop-towel that is disposable. I used heavy-duty blue shop towels and they worked well (not pictured)
- A scraper (it’s pictured above). When you get to the actual “antiquing” part, you’ll be scraping off some paint in a few places. This just helps that whole process.
- Plastic or a , especially if you are working inside like I was
- A coarser paintbrush to apply your stain later on in the process.
- An old t-shirt/cloth. This is what you’re going to be using to spread that stain around, so make sure it’s something that you’re willing to part with afterwards.
Even though that may seem like a long list, you may have some of these things lying around your house like I did. It was well worth it in the end when I saw a “faux-antiqued” dresser at a boutique the other day that cost well over $300.
Now, let’s get down to the fun stuff…

Step One:
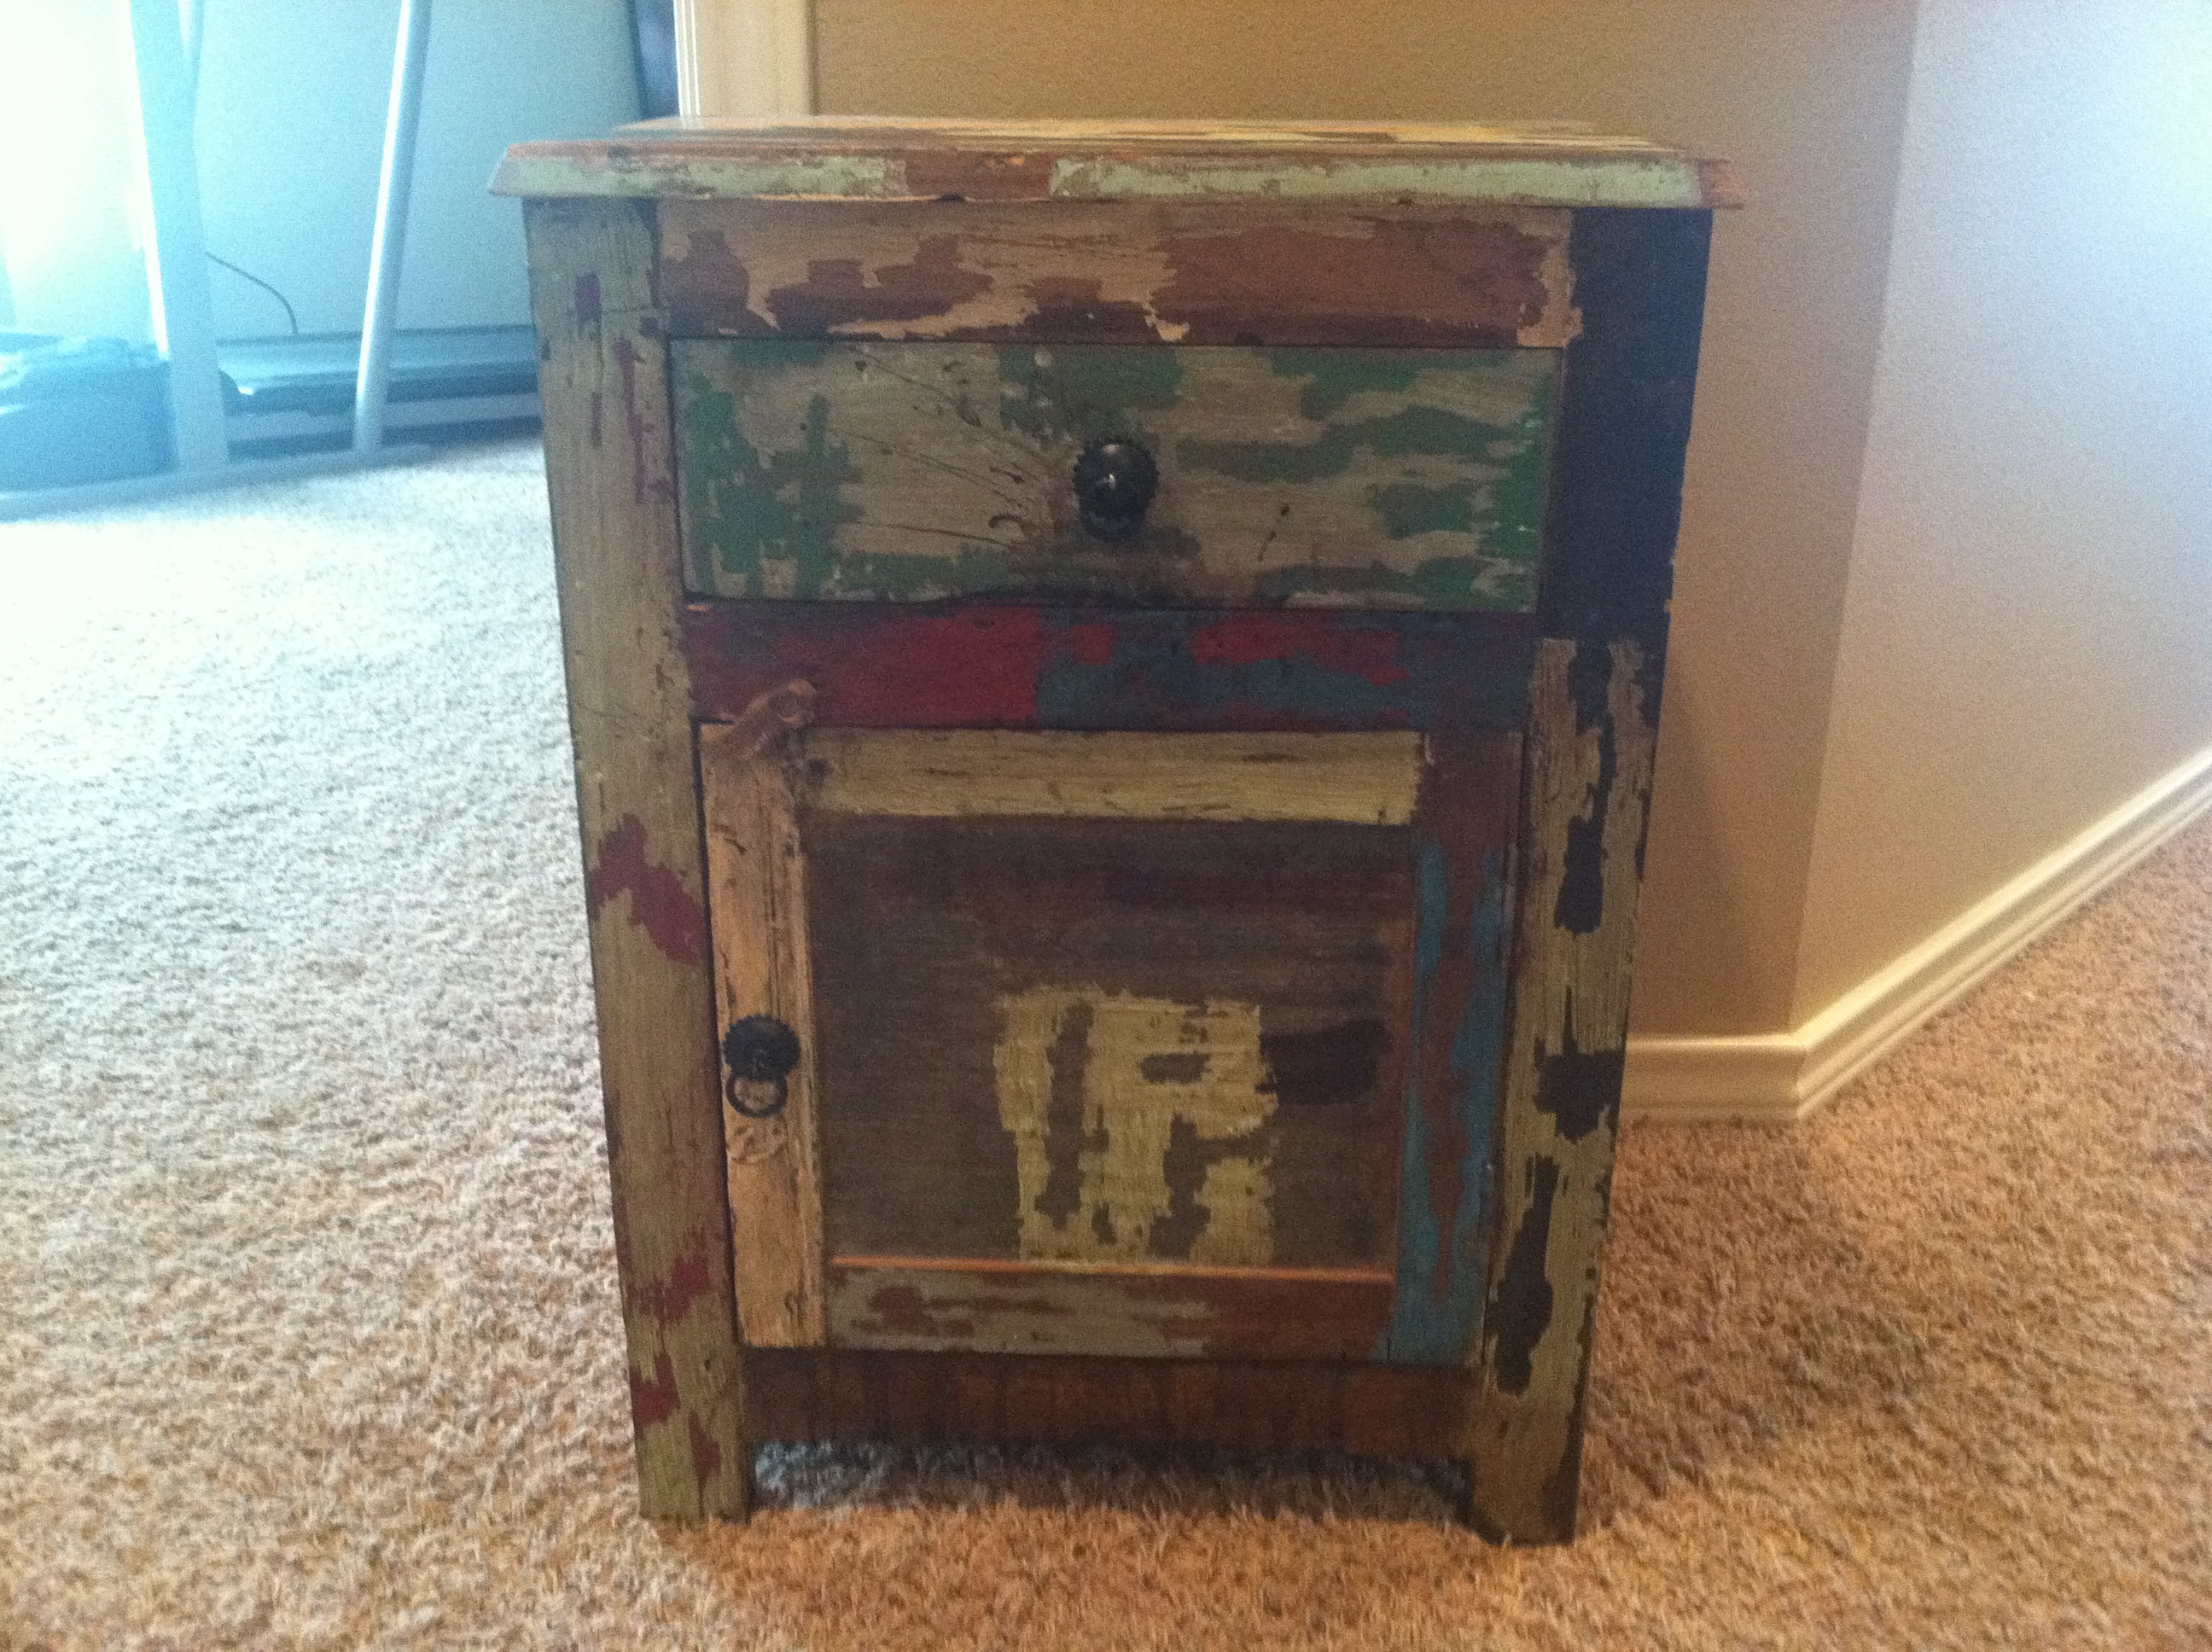
Find yourself some inspiration. If you read my previous post, you know that I was inspired by this weathered nightstand that is going to be in my room. I picked a nice shade of green that went nicely with said-nightstand, and we were all-clear to start the project.
Step Two:
Sand your stuff. Take off all of your drawer pulls and knobs and get to sandin’! I sanded down both my desk and my chair really well (especially the desk top and the seat of the chair). It depends on the finish of whatever you’re going to be painting, obviously, but in my case, I just needed to knock off a little bit of the old sealer so that my paint would stick well. After this, Wipe everything down with mineral spirits. I didn’t think this was important, but my Nina (grandmother) swears by the stuff… and now, I do too! It really removes all of that nasty dust that’s leftover after sanding something and cleans up your piece really well.
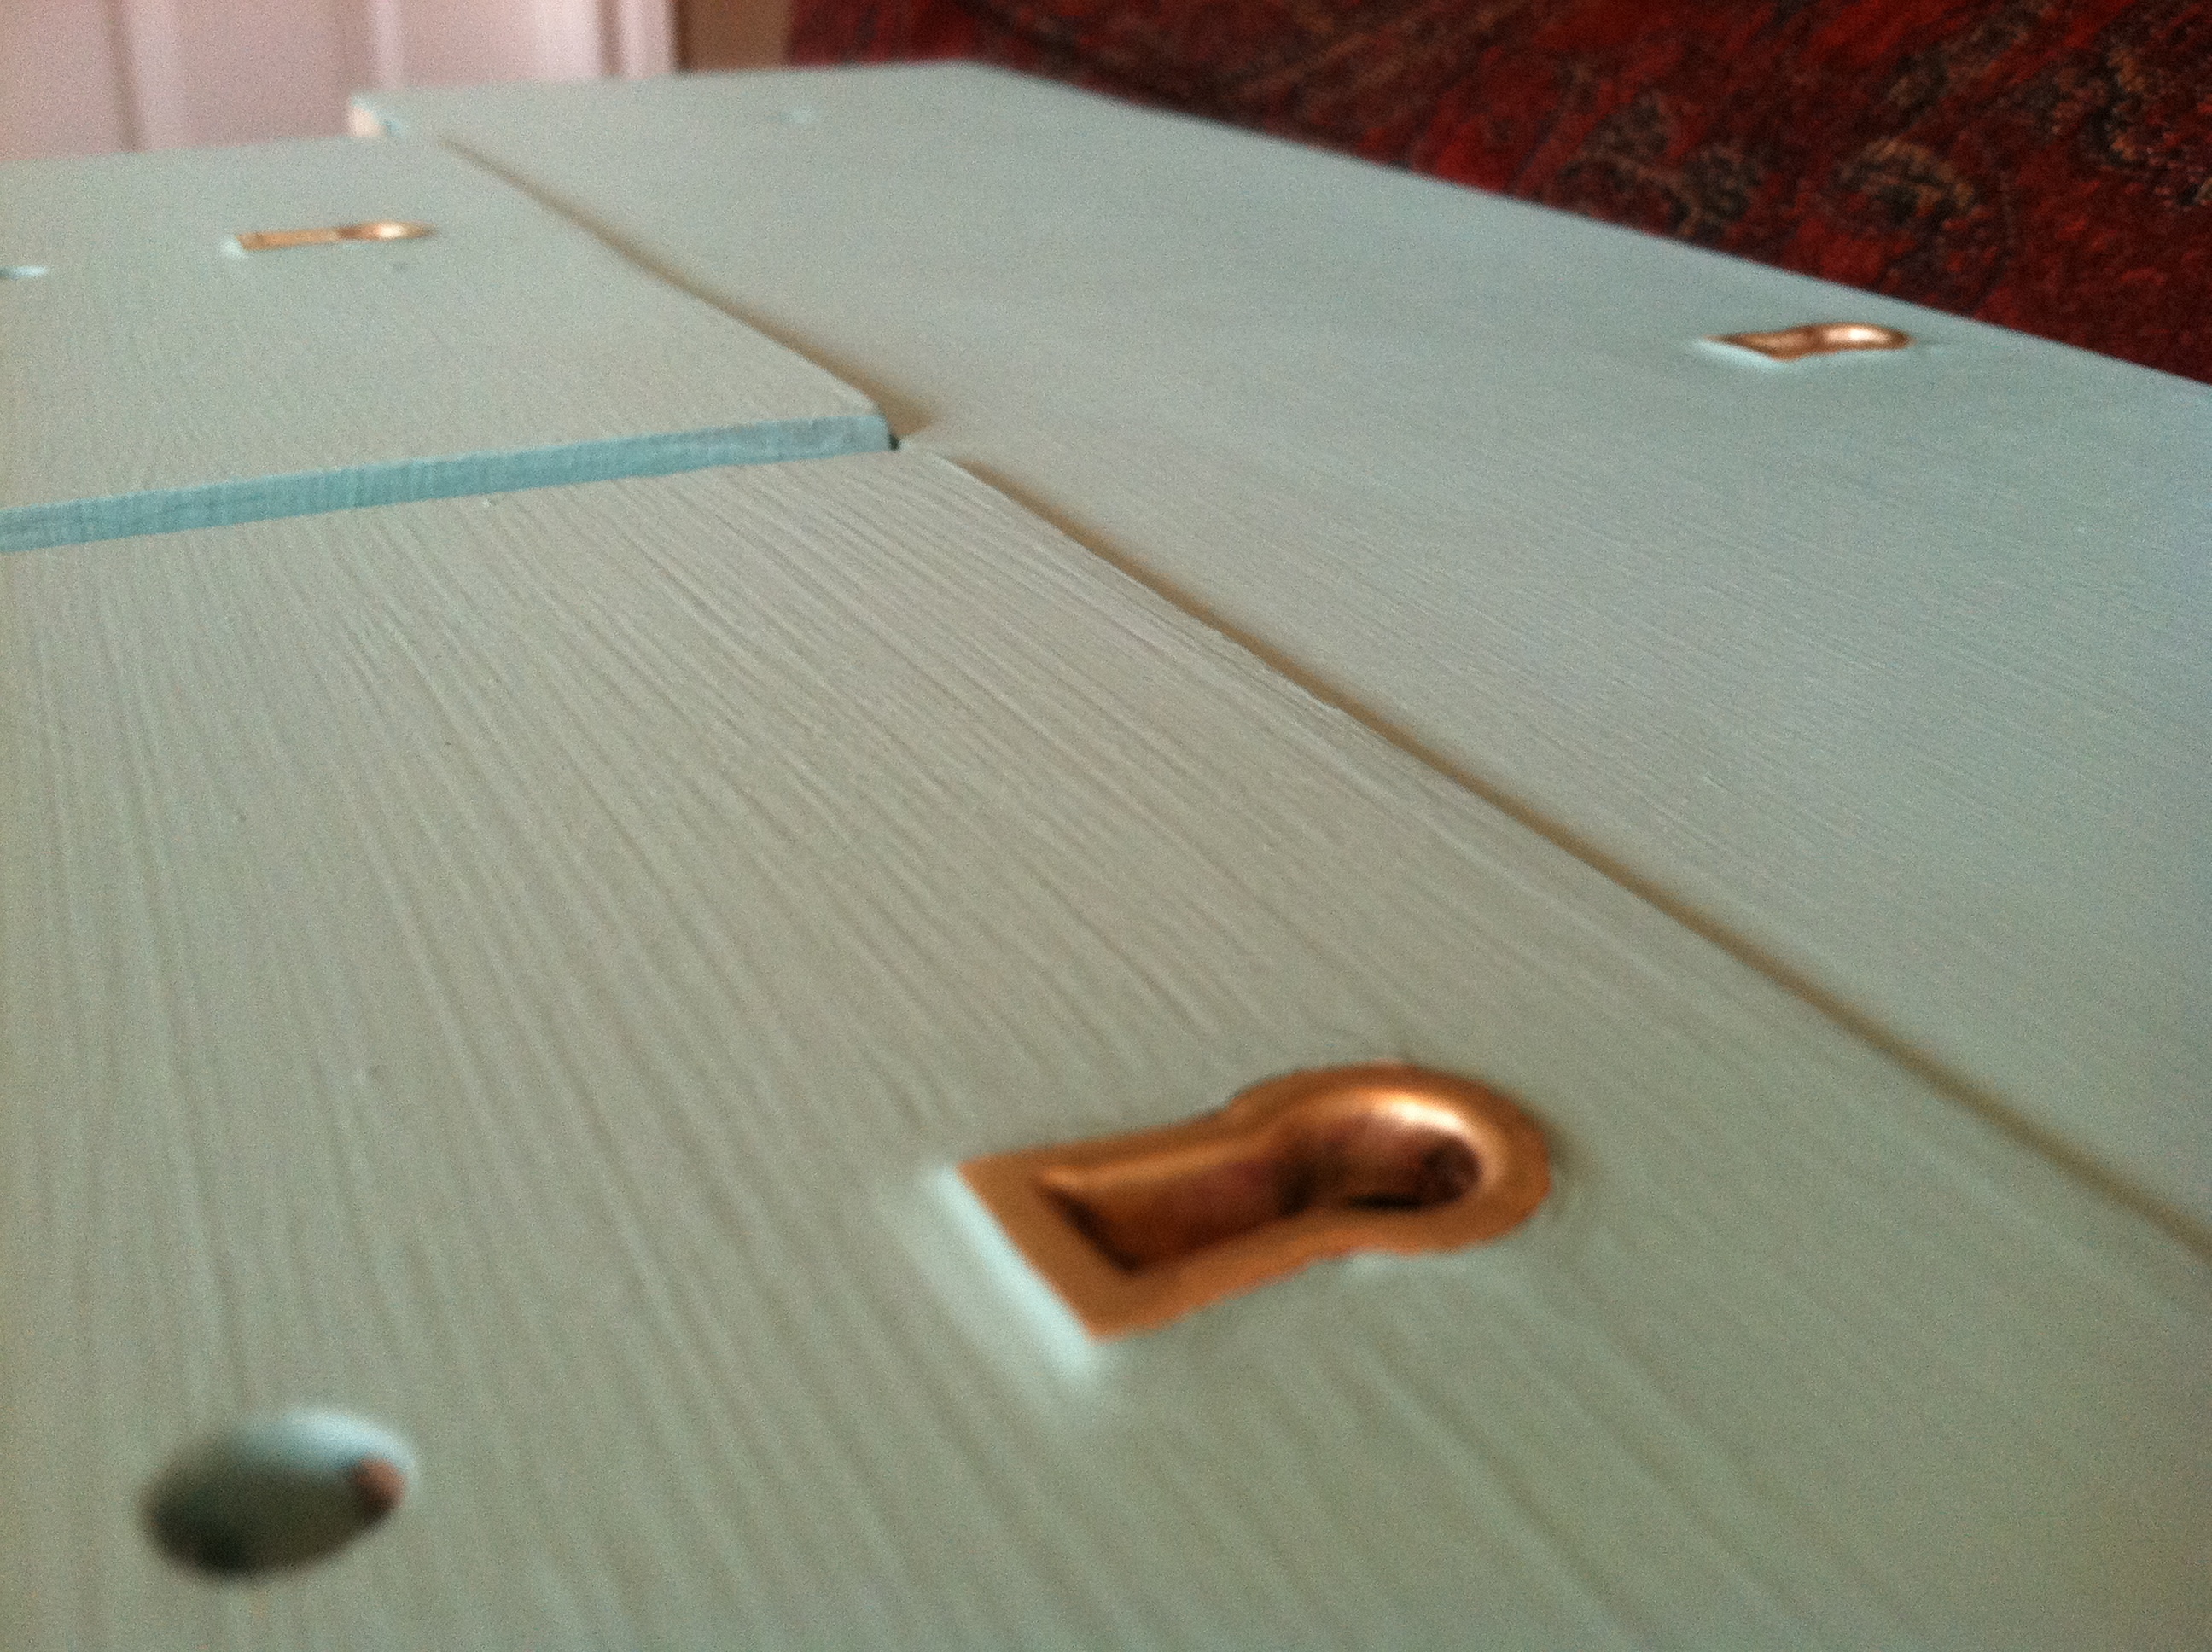
Step Three: Paint it up. I started with my desk drawers- I painted the inside first, then the outside (I recommend repainting the inside of the drawers, especially if it’s a thrift store find- it really freshens it up!) Then I moved on to the actual body of my desk. Then lastly, the chair! I let my paint dry for over 24 hours, but look at your specific paint label to see drying instructions. In the picture above for step three, you can see my cool green desk-top as it’s drying.
Step Four: Sand it down. Again. Find places that you think a desk would naturally wear down- I suggest starting with your drawers. Think edges and corners and around the knobs. The scraper can be used on the bigger surface areas of the desk, such as the top or on the sides. You’ll want to sand it or scrape it until the original finish is showing through (in my case, it was a dark stained wood). You can take off as little or as much as you want, but I would start small! You can always go back and sand off more.
Now it’s time to Break out the stain. Dip your t-shirt in a little bit of the stain that you chose and just rub it on. It’s that easy. In the places where you sanded down and the wood is showing, the stain will absorb more. Take a clean disposable towel or a clean section of your t-shirt and wipe the stain back off. You should get an “antiqued effect”, meaning that the wood has soaked up the dark stain, and the painted sections are streaked with your stain color. The intensity of the color depends on how long you let the stain soak in. Use your stiffer brush when applying stain to large areas (such as the desktop) and wipe it down with the t-shirt to spread it out over sections. In some spots, I even dipped the end of my brush in stain and tapped the handle with a knife to cause a splatter effect in some spots. Just make sure you do this over the plastic or drop cloth so that everything in your house doesn’t get a splatter effect. Finally, I left some places just painted- I didn’t want to cover every inch with stain. The goal is to make it look like it’s aged naturally.
Helpful Hints:
Always go with the grain of your wood (when you’re sanding, when you’re painting, when you’re wiping, ALWAYS).
If you got an area a little too dark with the stain for your taste, quickly wet a disposable towel and buff it. This will rub some of the color back off if you do it on time. If you let it dry for too long, hit it with your very fine grit sandpaper.
It will take off the layer of stain. But don’t sand too long, or you’ll be back to exposing wood again.
“Antique” the areas that show… This is a rather tedious process. If I were you, I wouldn’t “antique” the parts that didn’t need it, so I left the inside of my drawers stain-free.
I read several times that “Stain does not stick to paint. You will be left with a sticky residue.”– I hate to prove ya wrong, but it will. I used a flat finish paint, which might have something to do with how well it stuck. Also, I didn’t just paint the stain on and leave it. I was constantly wiping with a towel or t-shirt, which will allow the stain to color the furniture, but the stained area fairly dry to the touch.
Step five: Marvel in the beauty of your creation. Seal your furniture with a clear sealer to be sure it stays looking just how you intended. I soaked all of my hardware in Barkeeper’s Friend, which helped remove all of the tarnish to give it a new look without having to buy new hardware. If you don’t have any Barkeeper’s Friend, just use toothpaste or baking soda. It will work just as well.
Remember, this is your project. Don’t be afraid to experiment with it! Do some research before you begin, but don’t be afraid to try something that you think will work… If I were relying on google-search alone, I’d still believe that stain didn’t stick to paint, after all. Feel free to ask me any questions, and let me know if you’re going to be trying this on some of your furniture!
Here are a few of my “finished” photos! These are taken from my desk’s temporary home– our guest bedroom. I seriously cannot wait to set this in front of the window of my bedroom and fill it up with all of my ridiculous school supplies and write my first paper at it!

 Happy DIY-ing!
always,
Chaney


